API Explorer
- What is the API Explorer?
- How to activate the API Explorer?
- How to use the API Explorer?
- Security
- Server variables
The API Explorer is available from our Pro plan.
What is the API Explorer? #
The API Explorer allows you to test an API in real-world conditions directly from its documentation. It facilitates API discovery by enabling you to try out specific API calls on any server listed in your definition file. It helps you get started quickly without a testing environment or share a specific use case for discovery, support, or debugging purposes.
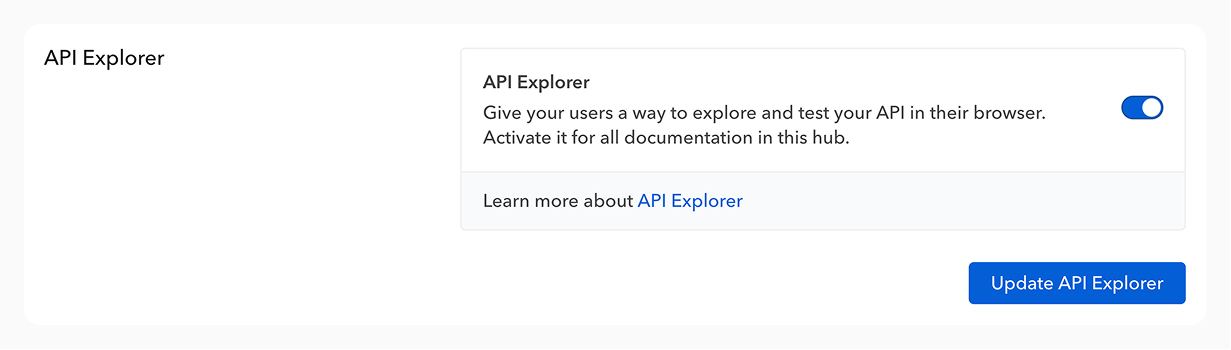
How to activate the API Explorer? #
The API Explorer can be activated for a documentation or a whole hub through an option in its “Settings” tab.
How to use the API Explorer? #
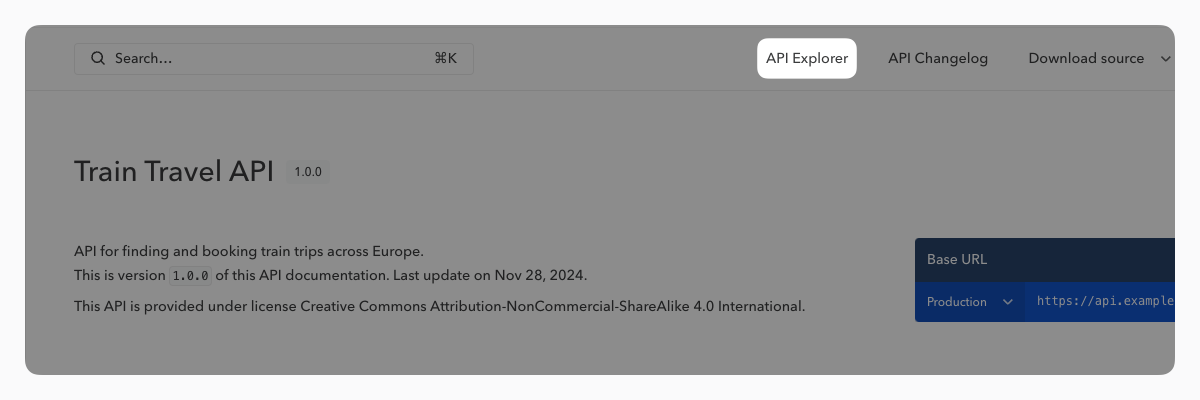
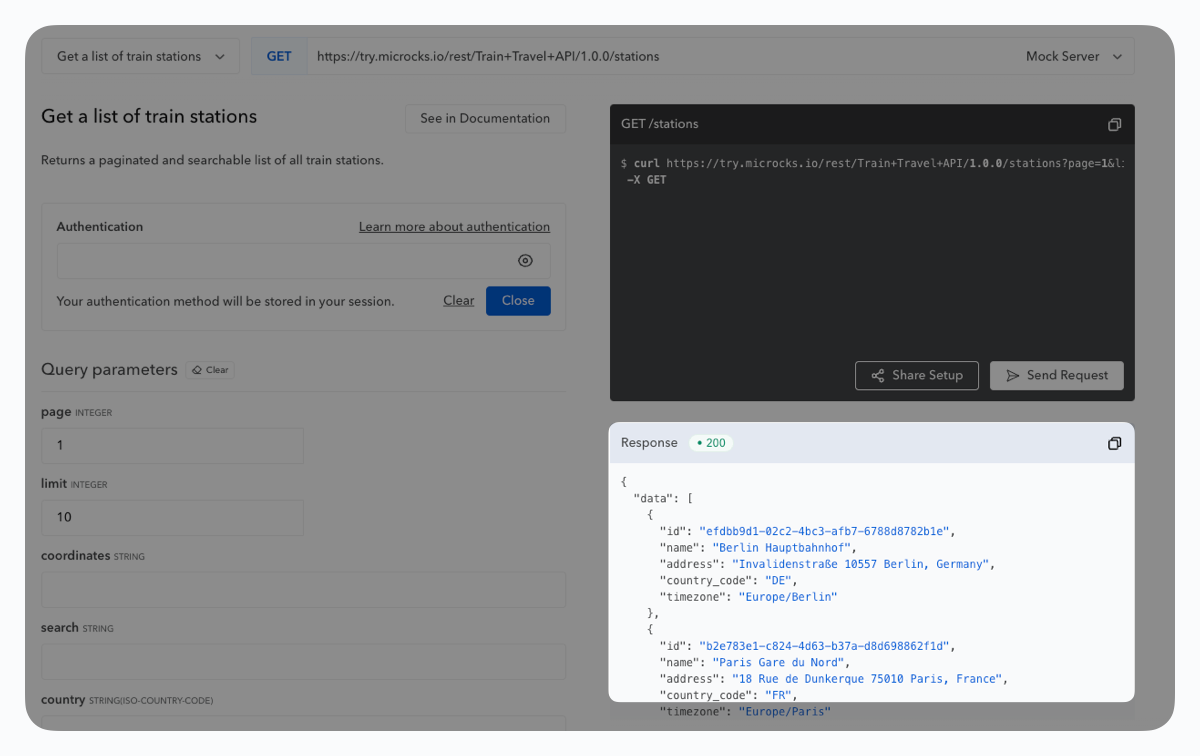
The API Explorer is accessible at any time via a button at the top of your documentation (and remains visible as you scroll). Each operation also features a button that opens the API Explorer for that specific operation.
If you haven’t opened the API Explorer from a specific operation, you can select one from the corresponding menu.
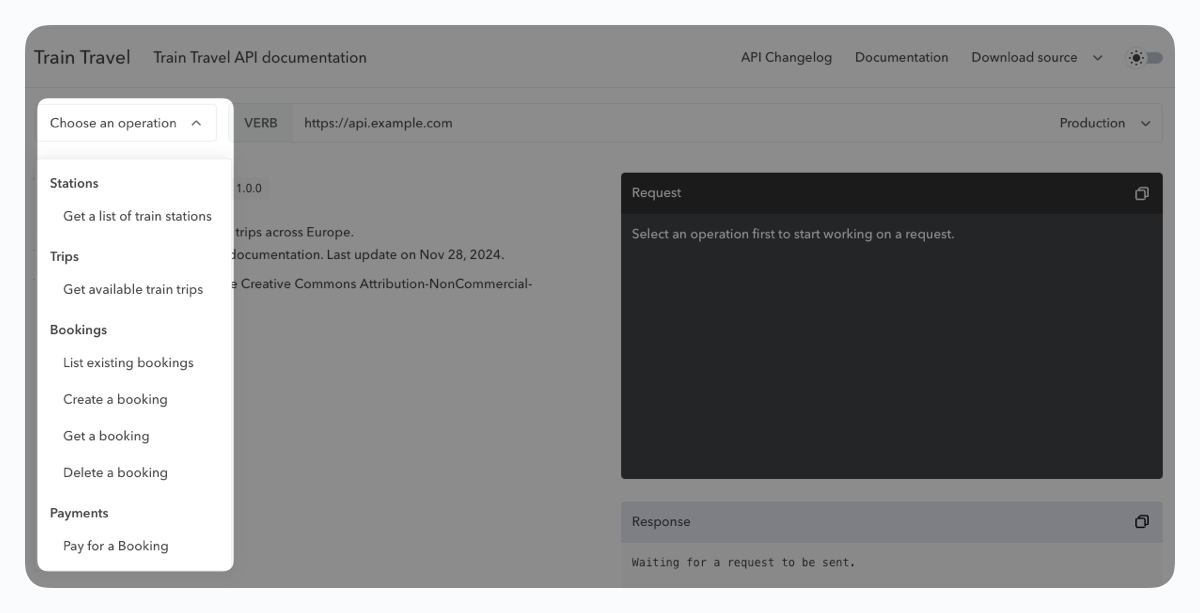
We identify the required fields directly from the definition file, making it easier for you to fill out the request, detecting whether it’s a boolean, date, etc. Fill in the expected information to execute the request and receive a response.
Sharing #
It’s possible to share a request setup, which is useful for showing an example in a demo or for support purposes. The share button generates a URL that includes the pre-filled request parameters.
This URL will never share your authentication parameters or the response.
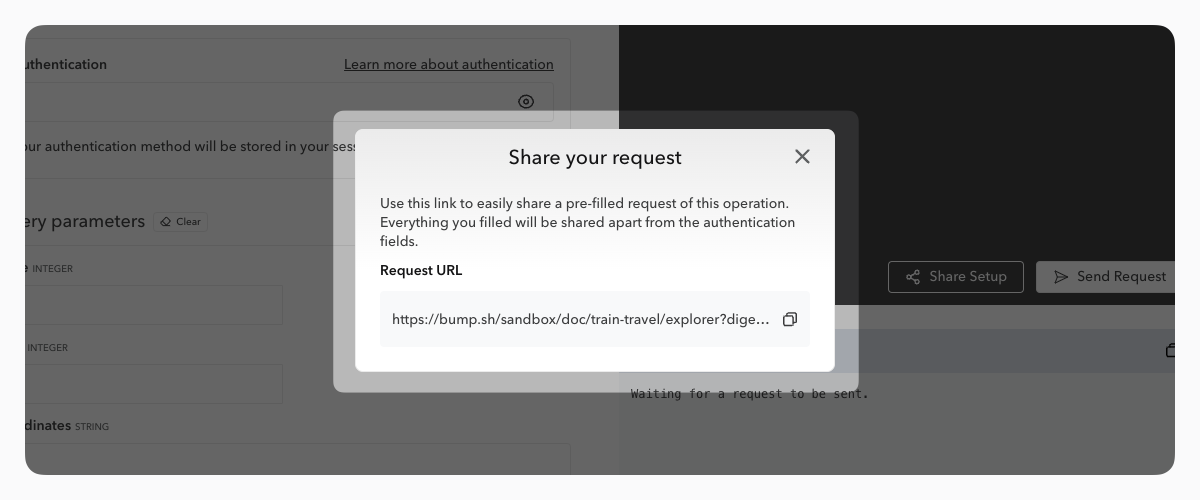
If the API documentation has been updated after the share URL was generated, the Explorer will notify you that the pre-filled fields may have changed and display a link to the API changelog for a more detailed review of the changes.
The curl commands generated when filling out the form are copyable.
Security #
To ensure maximum security and confidentiality of requests, Bump.sh does not collect or store any confidential data during API Explorer use.
Proxy #
To ensure optimal compatibility and total confidentiality, we chose to let the user’s browser process the requests rather than our main servers. Despite the obvious advantages, requests sent from a browser are sometimes poorly received by servers and result in what are known as CORS errors.
To avoid this situation, we created our own proxy, designed to ensure that requests sent from a browser are processed without error by an API’s servers, all while maintaining confidentiality and security: cors toujours.
This proxy is hosted outside our infrastructure to ensure data security. Its open-source code is available on GitHub.
You can also learn more about it in our dedicated blog post.
A future update will add an option to disable the proxy (meaning you’ll have to properly set up your CORS settings to use the API Explorer if you disable it).
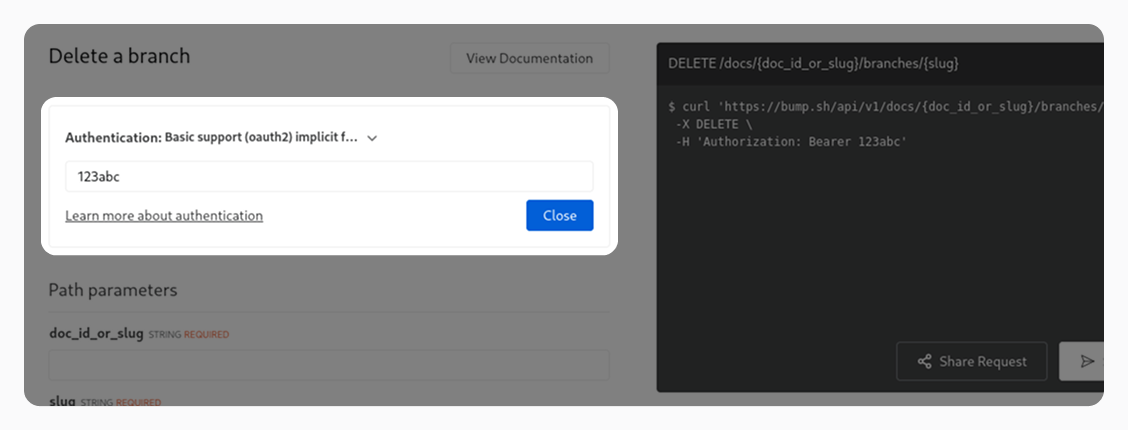
Authentication #
We support authentication for APIs that require prior authentication. Three options are available: via HTTP authorization (Basic or Bearer tokens), via API key (In header, query param or cookie) or via OAuth2 flows. These are the most common security schemes available in OpenAPI and AsyncAPI.
The authentication information are stored in the localStorage of the user’s browser, to avoid having to fill it out on every refresh/operation switch.
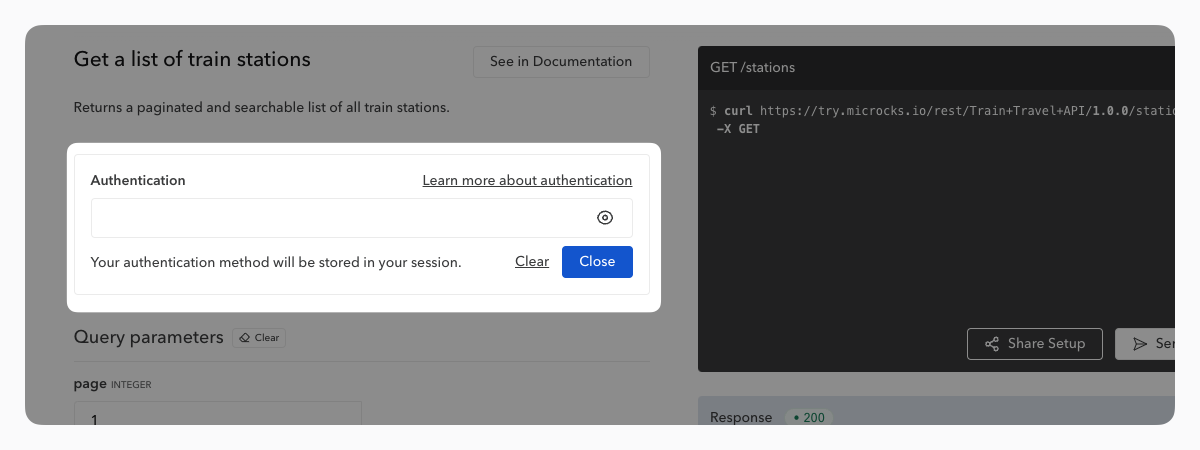
When sharing a request, this authentication information is never transmitted.
Details about OAuth2 flows #
For now we partially support the “Implicit” OAuth2 grant type for automatic access token retrieval. To enable this feature you will need to include an x-client-id vendor extension in the API definition file, in the OAuth2 implicit flow object. This value should be the ID of a dedicated OAuth client application created on your Authorization server to identify your API consumers.
E.g. for example:
components:
  securitySchemes:
    "OAuth2 implicit flow":
      type: oauth2
      flows:
        implicit:
          authorizationUrl: "https://auth.example.org/oauth"
          scopes: {}
          x-client-id: "123456abcdef"
All other OAuth2 flows are partially supported and will display an input field for the user to enter an access token manually (similarly to the HTTP authorization security scheme).
Server variables #
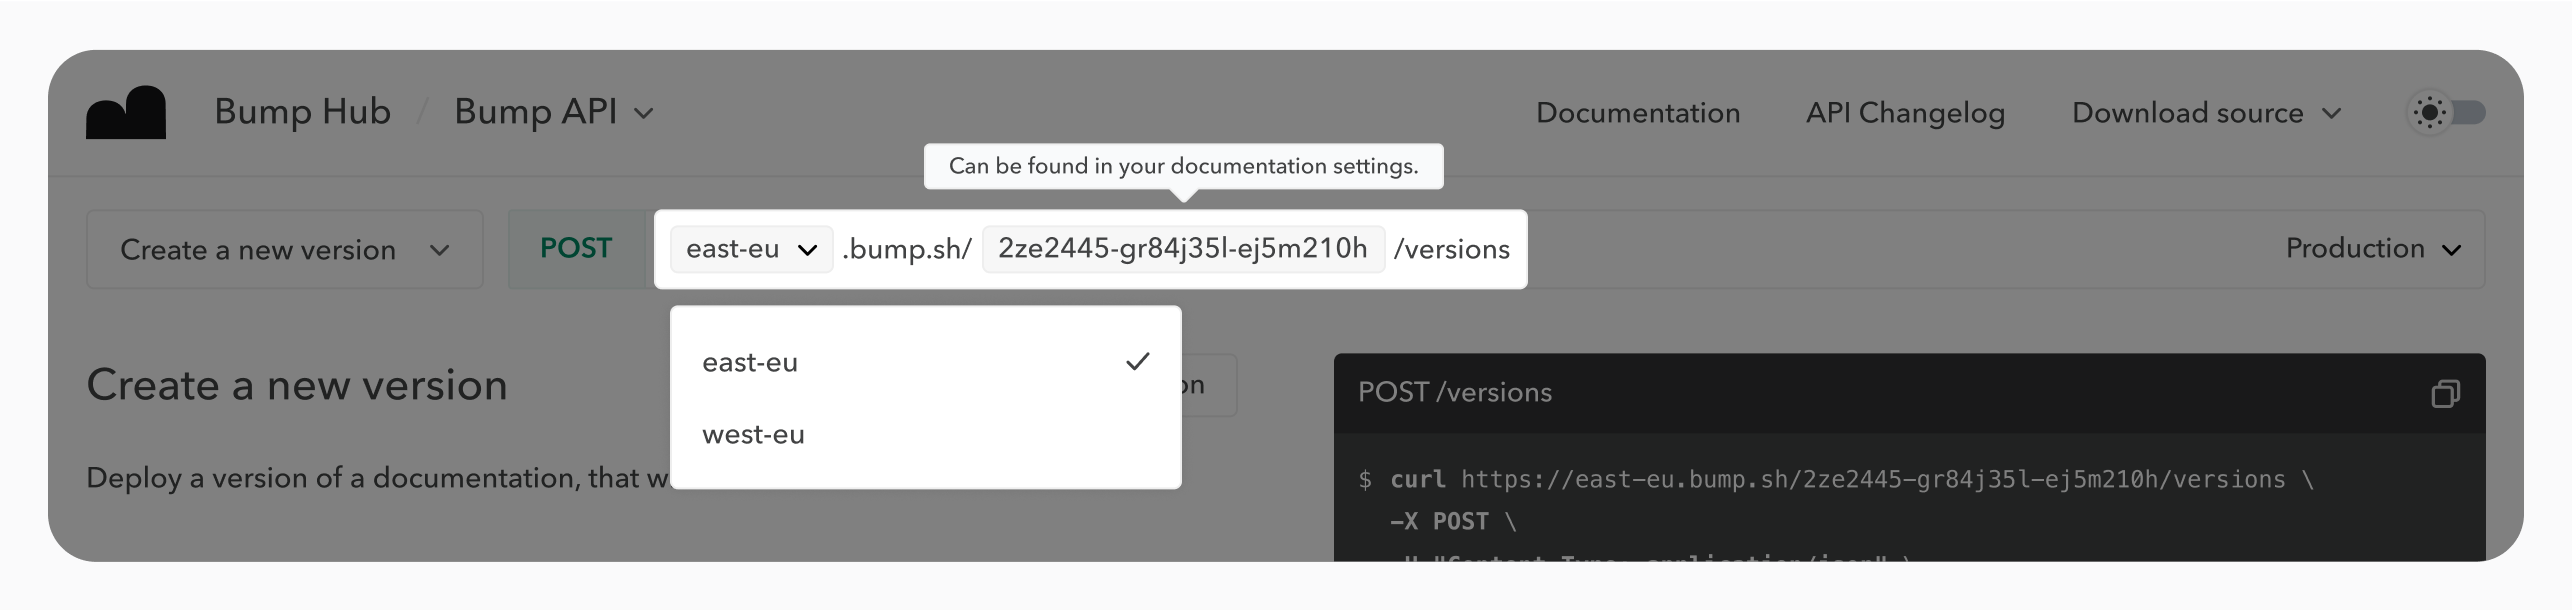
We support server variables in the API Explorer. Servers defined in the OpenAPI definition with variables in their paths are translated into enums and strings to be filled by the user of the API Explorer. It can be useful, for example, to choose between multiple server regions or to send requests to a subdomain that is specific to each API user.
A default value can be set for each variable. If no value has been defined, the variable field is filled with the variable’s name. Variable descriptions are displayed as tooltips above variables to guide the user into filling fields with the right information.
The server variables are stored in the localStorage of the user’s browser, to avoid having to fill it out on every refresh/operation switch.
If the domain is not clearly defined in the definition (for example by having
https://{my-variable}instead ofhttps://{my-variable}.my-domain.com), our proxy will block the request. More details about why we use a proxy here.
Learn more about server variables in our OpenAPI guide.
Example usage #
By defining two variables, region and docId, in the OpenAPI definition:
servers:
  - url: https://{region}.bump.sh/{docId}
    description: The production API server
    variables:
      docId:
        description: Can be found in your documentation settings.
      region:
        enum:
          - "east-eu"
          - "west-eu"
        default: "east-eu"
The API Explorer renders a dynamic path with a select for the region, and an input for the docId: